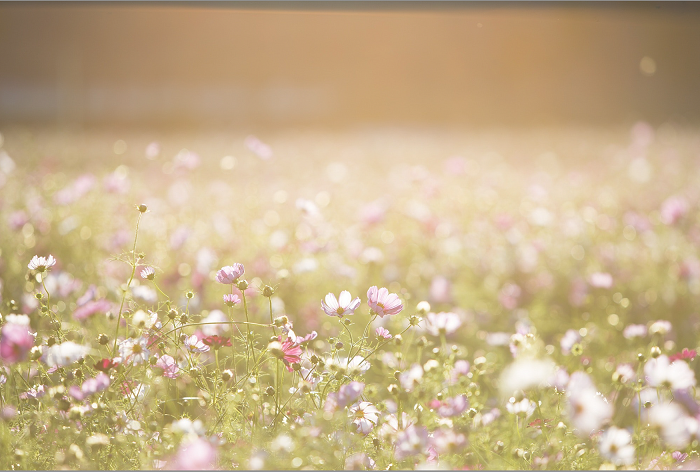
In Lightroom Classic, we’re going to guide you through the process of transforming a blurry picture into one that’s full of color and life.
Using the Dehaze Slider
The dehaze slider (also called the dehaze filter) offers a quick way to improve the look of hazy photos. We’re going to use it to remove the haze in this photo.
Select the Dehaze slider and move it to the right until the haze disappears. In our case, we had to move it to the end to remove the haze.
That was the quick-and-dirty way to remove the haze. We’ll set the dehaze slider back to zero so that we can show you some other ways that you can remove unwanted haze.
Other Methods to Dehaze Your Photo
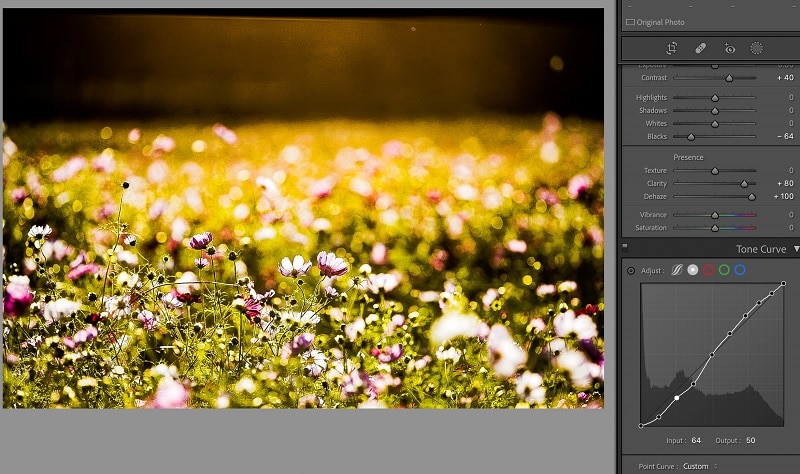
If the dehaze slider isn’t producing the desired results, try adjusting the Contrast, Blacks, and Clarity sliders. We increased both the contrast and the Clarity sliders and decreased the Blacks. This is the result.
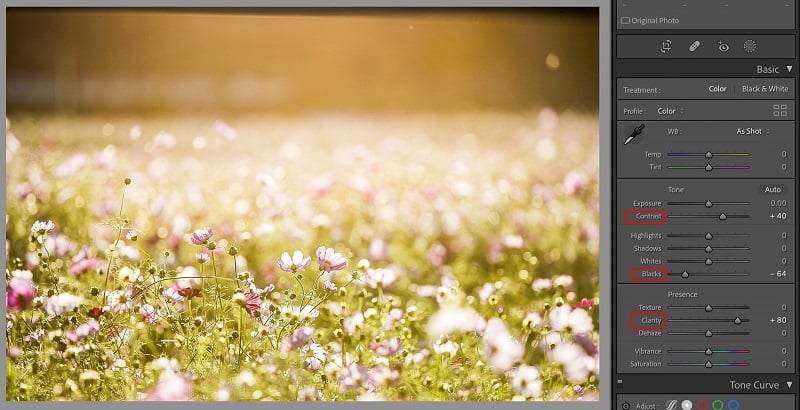
The result looks pretty close.
You can also try adjusting the Noise Reduction sliders to see how this improves the look of your image. In our case, it didn’t do much. So, we’re going to play around with the tone curve to see if we can reduce some of the haze that is going on in the upper portion of our image.
Using the Tone Curve
The tone curve in Lightroom Classic offers three modes.
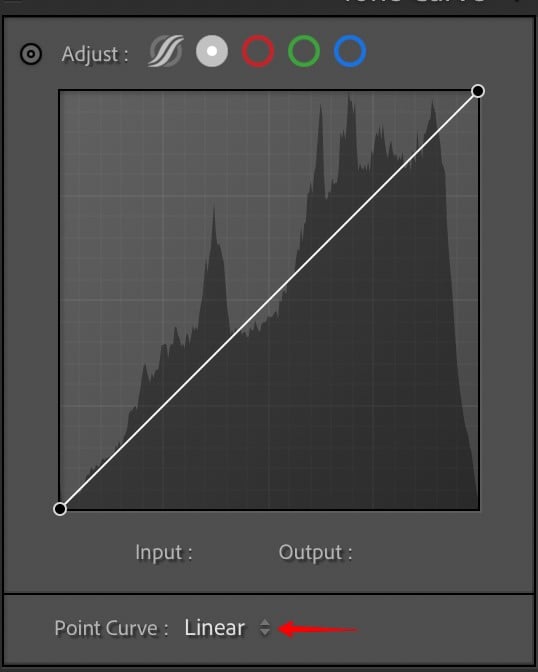
Linear – features a straight line that you can customize by adding points
Medium contrast – comes with points that form a slight dip in the black corner. The point position may look different on your screen, depending on what’s happening in your photo.

Strong contrast – offers a more pronounced dip in the black corner.
You can move the points up or down to see how this will affect your image. You’ll notice that the Point Curve setting now says Custom.
Click on the gray Adjust button in the corner of the panel and hover over different areas of your image. Notice how a white dot appears and moves up or down the curve, depending on where you hover.
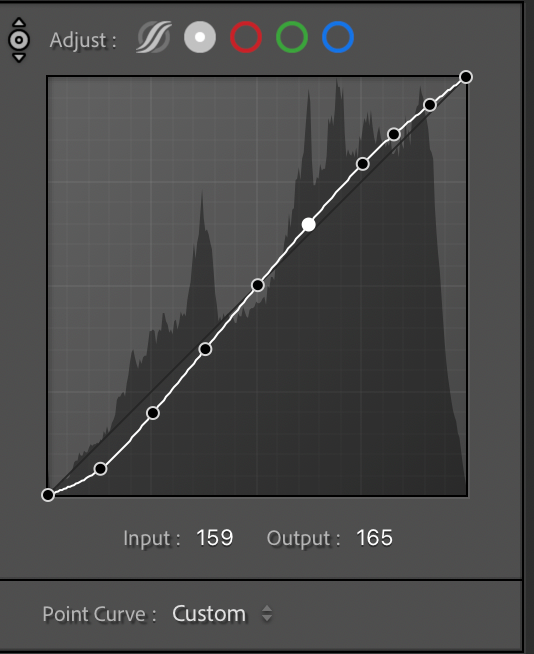
Click to set the point and move and position your pointer over the next area of your image.
This is what our tone curve looks like.
Once you have your points in place, deselect the Adjust button. You are now ready to start adjusting the points.
Start with the bottom points first and test to see how each adjustment reduces the haze . . . or not. If you make a mistake that a simple Undo won’t erase, right-click your mouse and choose Reset.
If the tone curve isn’t helping you produce the desired results, you can try keeping your curve and using the Dehaze slider to help remove the unwanted haze. That’s what we ultimately did with the image we were working on. Here is the result.
Overall, we’re happy with it. The haze has disappeared from the flowers, which now have a vibrancy that wasn’t present in the original. We can now see the brick wall behind the field!
You’ve learned how to use the slider features and the tone curve to remove haze from a photo. Try these steps for removing smoke, smog, fog, and cloudy skies! While the dehaze slider tool does an excellent job, it works even better when paired with the other adjustment sliders that Lightroom offers.
Frequently Asked Questions (FAQ)
How do you dehaze a photo with local adjustments in Lightroom?
In the curves dialog box that opens up, you will see two sliders: Black Point and White Point. The black point is where the shadows start getting darker, while the white points are where the highlights get brighter. You can adjust these settings by dragging them around or clicking on their labels.
Both sliders’ default values should be set at 0%.
What does the dehazing process do?
When you use the dehaze filter, the image data is modified so that areas with too much contrast between dark and light pixels become less intense. As a result, the overall brightness level becomes higher than normal without the effect applied. However, if the original exposure settings were correct, the final output shouldn’t look over-exposed. If this happens, adjust the Exposure slider until the desired amount of detail appears in your photo.
Why should you dehaze your photos?
Dehazing can help improve images with poor lighting conditions, such as those taken under bright sunlight or indoors during low-light situations. It also helps remove unwanted reflections from shiny surfaces like water droplets or glass windows. In addition, when used correctly, dehazing can make an otherwise dull subject appear more interesting by removing some of its monotone appearances.
Is the dehaze tool available for Lightroom mobile?
Yes! Go to the Effects menu and select the Dehaze option.
Is the dehaze tool available for Lightroom CC desktop?
Yes! You’ll find it in the Effects panel.
How do I get rid of the dehaze effect?
To undo the effects of the dehaze filter, click the Undo icon in the top left corner of the Effect Controls panel. To reset all the adjustments made to the image, click the Reset icon.
How do I change the color of the dehazed image?
Go to the Color Settings dialog box and select a new color profile. Click OK.
How do I save the dehazed image?
Choose a location and name the file.
How do I export the dehazed image?
Select a format and destination folder.
How do I import the dehazed image into Photoshop?
Open the exported .jpg file in Photoshop. Use the Open dialog box to locate the file.
How do I create a custom preset for the dehaze effect?
Click the New Preset button in the Effects panel. Select the preset you’d like to create. Then enter a name for the preset and click Save.
Other helpful articles:
How to Edit Portraits Like a Pro With Lightroom?
How to Effectively Use the Tone Curve in Lightroom 2022