Lightroom is a powerful tool that photographers across all experience levels can utilize to elevate the appearance of their images. In this guide, we’re going to walk you through the process of mastering portrait editing using Lightroom. Beginning with fundamental editing strategies, we will gradually progress to complex subjects including the refinement of skin tones and the elimination of imperfections. No prior expertise is necessary to dive in; simply proceed through each step methodically to understand the functionalities of each tool and its effectiveness in specific contexts.
Basic Editing Techniques
The first thing most photographers do when they open up an image is make adjustments to exposure, contrast, color balance, white balance, sharpness, noise reduction, and other settings. These are called “basic” edits because they’re usually done quickly without much thought about which tools work best for different types of images.
Adjust the White Balance Setting in Lightroom
The first thing a photographer must do when he opens an image is change its white balance settings. This lets him make adjustments to his photo based on the lighting conditions under which it was taken. For example, if there’s too much blue in the undertone of a white dress, you’ll need to change that. Here’s how. 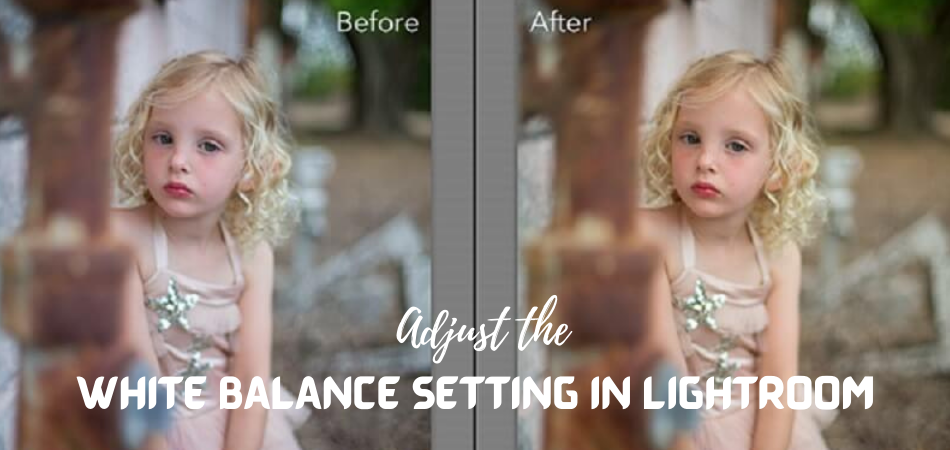
- Click on the Dropper tool.
- Choose a neutral color like gray and click on it. You will see the instant transformation that takes place.
- Adjust the Clarity, the Exposure, the Saturation and the Warmth until you are satisfied with the result.
Using the Histogram Display
The histogram display shows where light falls within the range of brightness values found in an image. It also indicates whether the exposure was properly balanced between highlights and shadows. If the histogram looks unevenly distributed across the screen, try changing the Exposure Compensation value until the distribution becomes even again. When you’re done making adjustments, click OK to save them.
Correct Color Saturation Using Curves
If the colors in your portrait aren’t quite right, you may want to increase saturation instead of decreasing contrast. As long as you keep dragging, the curves will continue moving higher and higher until they reach 100 percent. To reduce the amount of saturation, drag down toward 0%.
Correct Skin Tones with Clarity Presets
When you work with portraits, you’ll often find yourself dealing with skin tones. In order to remove unwanted discoloration, you might choose to sharpen the edges of the face. However, sharpening tends to cause noise around the subject’s eyes and mouth. A better solution would be to use clarity presets. These tools let you selectively soften or sharpen particular areas of the image while leaving others untouched. How do you achieve this in Lightroom?
- First, select the Face tool and then click the eye icon that appears when it is active.
- Next, click the Eye Mask button. This opens up the masking dialog box shown here. You should now notice four boxes labeled Soften, Sharpen, Smooth, and Clone.
- Choose whichever option that will make your photo pop.
Retouching Skin Tones and Removing Blemishes
Use the Spot Healing Brush Tool to fix blemishes on faces. Select an area where there are no other objects nearby. Use the brush size set at 5 px and paint over any spots that need fixing. Press SHIFT+DEL to delete the spot after painting. 
Remove Red Eye
If someone has red eyes, the pupils appear bright because the iris reflects back the camera flash into the lens. This causes overexposure and makes the person’s face seem unnaturally lit up. Fortunately, correcting this problem isn’t difficult. Lightroom offers two options in their Red Eye Correction tool — Red Eye for humans and Pet Eye for animals. Go to the tool well and select the third icon from the left. We’ll start with the procedure for removing red eye in animals because that’s such a prevalent problem with beginner photographers.
- Hold the spacebar and click on the image to zoom in on the animal’s eyes.
- Place the crosshairs in the middle of the first eye, then click and drag outward. You’ll see guides moving out and in the direction of your mouse. The guides must fit the entire eye perfectly.
- Release your mouse button to see the change. Uncheck “Add Catchlight” to remove any white spots. You can now move the catchlight around.
- Set your Tool Overlay to Auto. The “H” keyboard shortcut will toggle the overlay between off and auto modes.
- Adjust the pupil size and the catchlight until the eye looks normal. Follow the same procedure with the other eye.
- If your subject is human, you’ll want to use the Red Eye tool. Follow the same steps for sizing the crosshairs in the Pet Eye tool, moving the Darken slider until you achieve a more natural result.
Adjust Shadows and Highlights
Shadows are dark parts of an image where there’s no detail. They can occur naturally on people’s faces, but more commonly they result from poor lighting conditions. The easiest way to correct this issue is by using the Shadow/Highlight adjustment layer. 
- Drag the black point all the way to the top of the layer panel so that everything below it turns completely transparent.
- Select the Adjustment Layer. Use the following settings: Black Point 0; White Point 255; Midpoint 128; Slope 12; Gamma 2.8; and Exposure Compensation -10.
- To make sure that shadows don’t look too dark, try increasing the midtone value. If the highlights get clipped off, decrease the exposure compensation number.
Increase Vibrance and Saturation
The last step before printing is adjusting brightness and saturation levels. The easiest way to accomplish this task is by using the Adjustment Brush. Select the brush tool, set its size to about 3 px, and paint over any area where you’d like to change the overall appearance of an image. For example, if you want to add more vibrancy to the sky, simply move the cursor over the blue part of the photo and start painting. https://youtu.be/pgbxGP3LA64
Conclusion: Editing Your Photos Is Easy!
Lightroom gives photographers many ways to edit their images to produce high-quality photos. We have shown you some of the many ways that you can improve the look of a photo. The key thing about editing is knowing what settings will give you the results you want. Once you know how to use Lightroom effectively, you won’t need to rely on expensive software like Adobe Photoshop anymore. Just remember: if you’re not happy with the way something looks, change it until you are satisfied. Other helpful articles:
How to Effectively Use the Tone Curve in Lightroom 2022
How to Blur Background in Lightroom in 2 Ways