Let’s say that you took a great photo that you want to add to your portfolio. The only thing you would like to change is the hard edge on the bottom.
You’d like to give it a more artistic look that draws the viewer’s eye. We’ll show you how to use the brush and the gradient tool in Adobe Photoshop to achieve the effect you want.
The First Steps
- Open your image in Photoshop and save it under a new name. Resize the image to fit your canvas. Leave some space at the bottom so that you’ll have room to create the fade effect. You should have a background layer and an image layer (called Layer 1, by default) in your Layers Panel.
- Rasterize your image by right-clicking on it and selecting Rasterize Layer. If this doesn’t work, right-click on the image layer and select Convert to Smart Object. Right-click again and select Rasterize Layer. Rasterizing will allow you to edit the image.
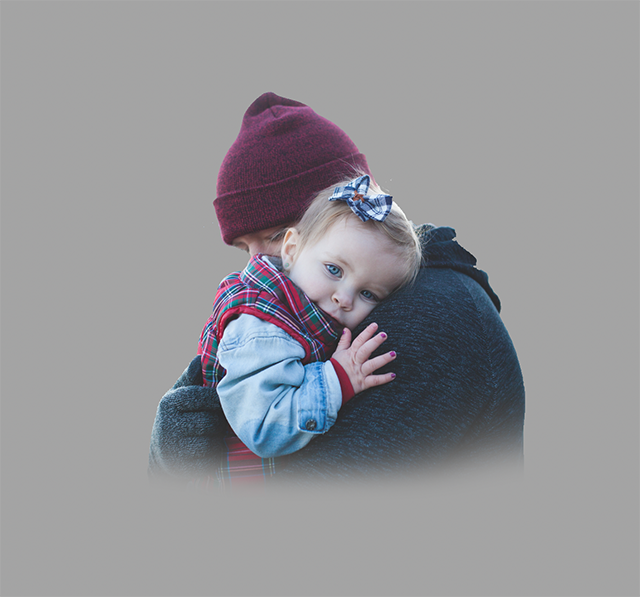
- Select the Magic Wand tool and use it to remove any background details you don’t want. Turn off the background layer so that you can spot any stray background pixels that the wand missed. When you’re finished, the result should look like this:

Now that we have the background removed, we are ready to begin the fading process.
Using the Brush Tool
The brush tool is good to have if you don’t want to achieve a “straight across” gradient. Soft brushes are recommended for gentle fading, but you can use other kinds to create different effects.
Step 1: First, we’ll need to create a layer mask. You’ll use the mask for your brush strokes. Move your cursor to the bottom of the layers palette and click on the white rectangle icon with the circle in the middle.

A second box will appear beside the image in the layers panel. This is the layer mask thumbnail. Always make sure this box is selected before you start brushing. Because if you make a mistake, all you’ll have to do is delete the mask and try again. If you inadvertently start brushing on the image and don’t like the effect, you’ll have to press Undo multiple times to clear out what you did.
Step 2: Set the foreground to black and the background to white. This will help you see how each stroke affects the image.
Step 3: Select a soft brush and decrease the hardness to 0 and increase its size to around 300. The larger the brush, the more “steps” your gradient will have. If you prefer a more natural fade, increase your brush size to around 500.
Make test strokes to determine whether you want to decrease the brush size. Swipe the brush back and forth below the image until the hard edge softens and disappears. If 500 turns out to be too big, tap the left bracket ( [ ) key to shrink the size as you work.

As you can see in the screenshot above, the bottom of the image has a smooth transition from dark to light. You’ll also notice that the layer mask thumbnail has a thick dark splotch that indicates where you applied the brush strokes.
Testing the Effect
Now we’re ready to test out how well the gradient fade worked.
Create a new layer and position it below the image and mask layer.
Select whatever fill color you want and look at your image. If you still see a hard edge, keep using the brush to soften it.
Creating Other Gradient Styles
You might decide that the soft brush produces too bland of a result, especially if you are trying to achieve an artistic effect. If this is the case, make sure your mask layer is selected. Then grab the square marquee tool, select your brush strokes and hit Delete. Now, you’re ready to try again, using the variety of brushes in your library.

If you don’t find what you need, you can check out what the Creative Cloud has to offer for Adobe Photoshop. Creative Market, Envato, and Graphic River are also great resources for finding artistic brushes. Experiment with different brushes until you achieve the effect that you were looking for.
We used a spatter brush to create our final rendition, using various brush sizes to remove the hard edge that was in the original.
Using the Gradient Tool
The gradient tool is the fastest way to fade a photo in Adobe Photoshop. It’s easy to learn and very versatile.
Create a new layer mask and choose the gradient you want. Start the gradient at the edge of your image and move up to the desired transparency distance.

Hold down the Shift key to create a straight gradient. Click and drag your mouse to the left or right if you want the gradient to move on an angle.

This tutorial showed you two ways to apply a simple but effective gradient style to your photos. The gradient tool provides you with a quick and easy way to fade your photographs, while the brush tool allows you more creative freedom in how you achieve the desired result.
Frequently Asked Questions
Can I use any type of brush to create a custom gradient?
Yes! Any brush you own should work just fine. However, some brushes may not produce the same results depending on their settings. For example, a round brush set to 100% opacity would likely cause problems when fading images because there’s no space between individual pixels. A softer brush setting could solve this problem by creating fewer steps per pixel.
May I use other tools, such as Liquify, to create gradients?
Absolutely! In fact, many people prefer to do so. It all depends on which method works best for you. Some photographers like to start with a basic shape before adding details. Others prefer to add detail first and then blend everything together. Either approach will give you good results.
How do you fade part of a picture?
It really comes down to personal preference. You have several options:
1) Create a selection around the area where you want to fade. This option requires less time than the next one.
2) Use the Magic Wand tool to select only the areas you want to fade. Repeat these steps until you’ve covered the entire area you wish to fade.
What about blending modes? Can they be useful for fadings?
Blending modes allow you to control how much of either color or texture from another layer gets added to the current layer. They come in handy when you want to soften edges without losing contrast.
Do you need to have a background in order to fade an image in Photoshop?
No. If you’re working inside a document window, it doesn’t matter whether you have a white background behind your subject. All layers appear over each other regardless of their position within the stack.
How do I fix heavy fading in Photoshop?
If you don’t have a white background, however, you’ll probably find yourself having trouble getting rid of unwanted elements. To get started, simply click “New” under Layer 1 and name it something like Background. Then go back into your main file and delete the old Background layer. Now you can safely erase anything else that might interfere with your faded effect.
Is it possible to make my pictures look better after applying a gradient filter?
Of course! There are numerous things you can do to improve faded images. Here are a few suggestions:
- Adjust the brightness/contrast of the image.
- Reduce noise.
- Sharpen the image.
- Add vignette effects.
- Change the size of the canvas.
- Apply filters.
- Convert the file format.
- Save the file under different names.