Let’s start with the basics. When you use your phone camera to take a picture in the dark, it doesn’t require a rocket scientist to deduce the fact that you won’t see a thing. Oftentimes, what we do since the advent of a flashlight is to put it on and retake the picture.
So, we cannot separate light from photography. Light is one of the most essential elements of the art; a skill any fine photographer must have under his belt for employment every time.
I mean, he must understand the types of light and be able to see how it will affect his photo even before taking a shot. Sounds like a difficult thing to do, yes?
Well, isn’t that the reason why they are professionals, eh? While light is a general requirement in photography, intensity, quality, and duration are another subject matter, and this is where professionalism comes to play.
Indeed, photography can be indoor and outdoor and interestingly differ in light management. Our focus today is on outdoor or natural light photography.
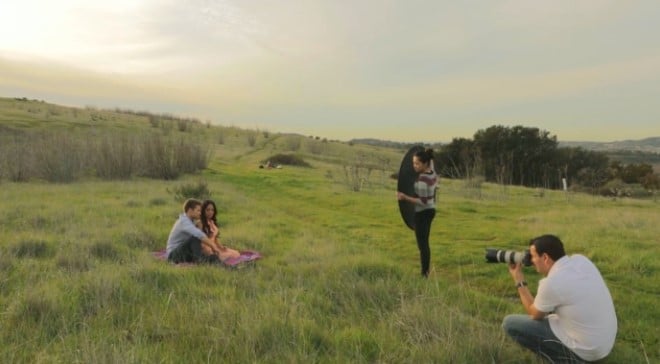
Now, when a photographer intends to take outdoor pictures, beautiful golden light of the sun when it is setting or early morning sunlight (when the sun is still low on the horizon) is the best choice, but that’s not always practical because it takes two to tango. What do I mean? Clients and situations!
A photographer is dealing with a variety of clients, some of which don’t fancy early morning or sunset photoshoots. In some cases, it’s a situation neither the client nor the photographer has control over, say wedding ceremonies.
Most ceremonies are usually at noon when the sun is in the middle of the sky and the light is unfavorable. In such scenarios, a major issue the photographer will be dealing with is shadow casting.
Your final image is expected to have a magical, ethereal appearance, but harsh light poses a challenge to achieving this effect by casting a shadow in your shoots. Cringe no more because this guide will provide you tips as to how you can avoid shadows in your outdoor photography, and master the use of light.
How Can You Avoid Shadows in Outdoor Photography?
Backlighting
A shade from the sun will naturally do the trick of shielding unwanted sun rays but where that is unavailable and you have no other option than to place your client in the sun, well a simple tip is to use the client as the backlight itself. How?
Position your client (or subject, as the case may be) such that their back is to the sun. That way, you will be able to shield a significant magnitude of sunlight from falling on their face.
They can desirably express their face without the worry of squinting or whatnot. More so, the face of the client (or main part of the subject) is evenly shaded.
Backlighting is easier to do with a single subject as you can position it perfectly to avoid sunspots but when you have two or more subjects, you could have them turn slightly inwards or bring their faces closer to each other.
Use a Reflector
A reflector is used to bounce or diffuse light. By bouncing light, you can send light to reach areas that would have otherwise been shadowy or dark. 5-in-1 is a common reflector that features five different options concerning the kind of lighting you aim to achieve.
Types of Reflectors
1. Silver Reflector
This reflector is one of the most preferred choices in bouncing light and filling in shadows. Its preference comes in its ability to bounce a significant amount of light without altering the color. The picture remains balanced and neutral.

You can use this reflector at distances of your choosing, and it’s a huge reason why it’s more preferred for portrait photography.
2. White Reflector
The white reflector is somewhat similar to the silver because it maintains a neutral color still. The major difference is in the amount of light they bounce; the white reflector bounces a lesser amount of light as compared to the silver reflector. However, it produces a softer, less intense effect.
3. Gold Reflector
As the name implies, the reflector fills in shadows by adding a tint of gold warmth to your pictures. It’s most appropriately used in sunset or sunrise situations where the golden effect of the sun can be exploited.

Although the added warmth can produce an appealing effect on images, it should be rarely used to avoid unrealistic expression and unbalancing of natural skin tone.
4. Black Reflector
The black reflector is the opposite of the other three reflectors aforementioned. It is used when you prefer a lesser amount of light falling on the subject.
5. Diffusion
Diffusion is sometimes referred to as a type of reflector, “scrim”. What the diffuser does is absorb the sunlight and spread it evenly on your subjects. You can achieve this by holding the diffuser over your subject to prevent direct glare from the sun. It gives your client some relief from the harsh sun and also casts a soft image.
The simplest way to make a diffuser is using a piece of translucent white fabric.
External Flash
You can also integrate an external flash which can fill in the shadows created while shooting in harsh daylight. Ensure your integrating of an external flash is with the use of natural light.
With the aid of this guide, I do hope that when a client requires a photoshoot in the middle of the day, you’ll confidently make the best of it with the techniques that have been shared.