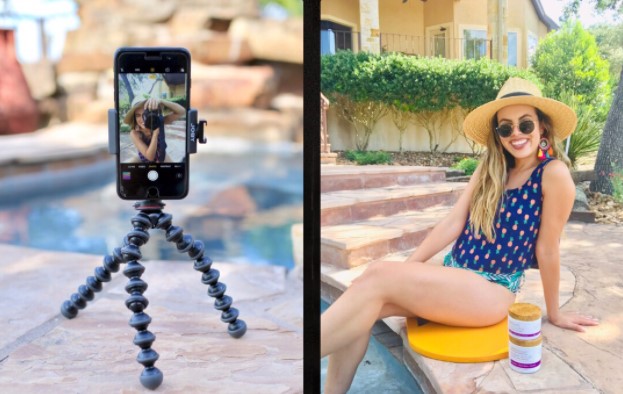
Tripods are amazing accessories that help in taking brilliant photos.
You can mount your camera on the stand, sit back, and take multiple shots from a particular position.
Besides, they create balance and enable you to focus on the subject you want to shoot.
However, there are times you may not have this accessory but still want to take good pictures.
Whether it is for yourself or a particular subject, you can’t be limited just because you don’t have a tripod. So, how do you make this happen? Let’s find out in this article.
Tips on Taking Pictures of Yourself Without a Tripod
Tripods are amazing accessories for your camera. However, you can still get stunning images even without them.
Whether you are at home or outside, you can create your desired result. Here are some tips to consider when you find yourself in this situation.

1. When Taking Handheld Pictures
Taking handheld pictures can be a bit difficult because the camera tends to often shake. This is where a selfie stick comes in handy for smartphones.
But, what if you are not using a smartphone to capture the shot? You need to find an alternative. To do this, you need to stabilize your body positions. When holding the camera, extend your arm as far as possible.
Then, ensure your head is in a natural position as a natural reaction could have made it look weird while extending your arm.
Besides, you can use the shutter speed to prevent any distortion on the shot. Here. you have to consider the available light as well as the lens of your camera.
For instance, if the lens is 50mm, then the minimum shutter speed to employ will be 1/50th sec or a faster one. Meanwhile, if you are using a 200m lens, then the minimum shutter speed will be 1/250th sec.
Anything less than this could make your camera shake and distort the captured shot.
2. Use Your Camera Bean Bag for Support.
Since you are taking a picture without a tripod, then you have to outsource other alternatives that can maintain balance. Hence, the need for surfaces (rock, fence, wall, bin, tree etc) arises. Finding the appropriate surface can give you an edge while taking pictures.

However, you may not be able to get the correct angle for your shot. This is where your camera bean bag comes in. They give you the needed support to take a good shot of yourself.
To do this, place the bean bag on the surface, and your camera on top of the bag. If you want to take it from a particular angle, you can fold, twist or roll the bean bag to the desired proportion. Then, select the shutter speed to capture the moment.
Also, you can create a more natural-looking photo with the bean bag. All you have to do is to place the bean bag against a wall and then, lean your camera against it.
This enables the camera to shoot without flash. With this, you create a natural-looking photo with little or no traces of shadow in it.
When you intend to do this, ensure that the surface, bean bag, and camera are stable. Unstable setups make the camera slip off by accident and cause expensive damages.
3. Consider the Environment’S Light
Lighting is a crucial element when taking pictures of yourself. A bright light shining directly at you can create a harsh shadow, distortions, and make your pictures less appealing.
Meanwhile, a location with little to zero light may not illuminate all the features around you. Therefore, you have to consider the light of your environment. To do this, you have to consider the angle or direction of the light source.
Also, ensure that the quality of the light is moderate. It must not be too dim or too bright. After this, have the light behind your camera and take a position that will enable the light to illuminate you and the environment.
When considering the light, you can select a nice sun ray, probably sunrise or sunset to tone your skin colour and illuminate the face appropriately. If you are indoor, you can stand near a window to create a fantastic shot. Consider the lighting to avoid blur pictures or distortion on the shot.
4. Consider the Composition and Aperture
Composition is one of the elements that make a picture look great. Here, you have to consider various techniques of composition to create the perfect shot. Techniques such as the rule of thirds, framing, colour, and others enable your picture to stand out. For more composition tips, you can check a guide here.
As for the aperture, you have to consider using the appropriate shutter speed to create the desired result.
Here, many professional photographers select a range of f8 or f11 to create sharp pictures. Besides, the setting often differs among cameras. For instance, cameras such as SLR/DSLR require an S setting (shutter priority).
Meanwhile, other cameras require the T setting. Hence, you have to know the features of your camera and employ the appropriate technique to create the desired result.
5. Use the Self-Timer and Remote Control
Self-timer lets you know when the moment is taking place. With a remote control, you do not have to go back and forth in front of the camera.
You can reset the camera and position yourself appropriately to save time and energy.
Some cameras even come with WiFi that allows you to dictate the command via your smartphone. Therefore, you can get a nice picture of yourself without the help of a third party or accessory.
Bottom Line
Tripods are great accessories. However, you can still make a perfect shot without them. Follow the aforementioned tips and get optimal results.
