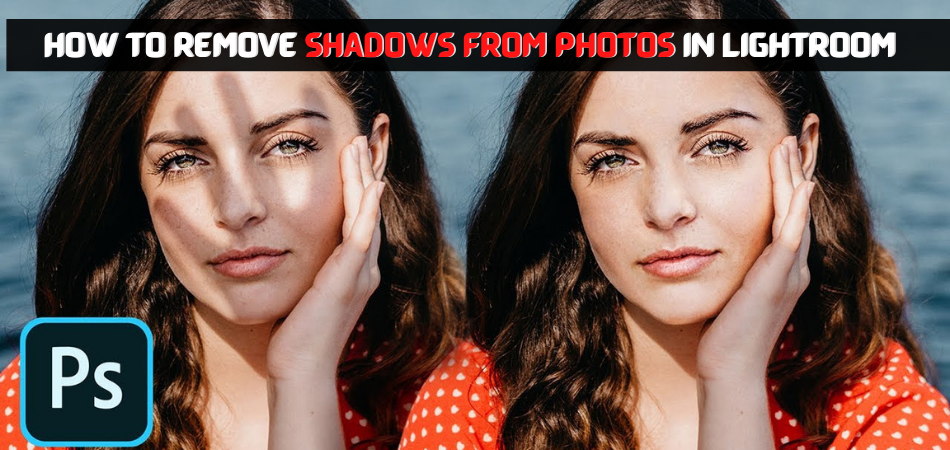
Often, outdoor photographs are plagued by uneven lighting, which results in prominent shadows. Such shadows can distractingly pull attention away from the primary focus of the image. This problem has led numerous photographers to seek out methods to remove these shadows from their pictures. While it may seem difficult to fully get rid of shadows in a photo, this guide will demonstrate how simple it is to eliminate them using Lightroom!
How to Remove Shadows from Photos in Lightroom
Use the Global Adjustments
Start with the Shadows slider and adjust the level, so the shadows aren’t too deep. Also, change the Highlights, but be careful not to muddy the background as you try to lighten the shadows. Prevent muddying by moving the Highlights slider slowly until you get the adjustment between the shadows and highlights to look natural.
We can also use the Whites and black sliders to adjust the overall lighting in the image. We don’t want to blow out any of the highlights or make it look like we have shadows again, so be careful with these adjustments.
These sliders allow us to remove most of our shadows without doing much more work, but we can apply one more adjustment to our photo.
Adjust the Local Adjustment Overlay
In the bottom right corner of Lightroom, you’ll see a few icons along with three empty squares. The middle square is for local adjustments so that it will change only part of your image at a time instead of the whole photo.
With the local adjustment tool, you can click to select a specific part of the photo and use the sliders in Lightroom to manipulate those areas. This is very helpful for removing shadows because you can isolate an area of your image, remove the shadow, and then move on to something else without affecting the rest of your photo.
To remove shadows, click on the area where there aren’t any shadows. Hold down your left mouse button as you hover over the image, and a dark box will appear over that spot. This is your selected area, which allows you to use local adjustments on just that part of the photo.
You can then move the sliders around until there’s no longer a shadow in the selected area.
When you move the Shadows and Blacks slider back, you’ll see that there’s still a shadow over the top of the window in your photo. That’s because natural light from the outside illuminated it, but you can also use the same technique to remove those shadows.
Lightroom’s local adjustment tool is a great way to get rid of shadows in outdoor photos. It’s easy to use and allows you to make these adjustments without affecting the rest of the image. You may have noticed that this technique isn’t perfect and leaves some dark spots, but it should improve your photos quite a bit!
Use the Brush Tool
Lightroom’s brush tool can also remove shadows. This tool allows you to create a brush that covers the area you want to adjust. You can then use this brush on any part of our photo and make changes through Lightroom’s other sliders.

To use the brush, click the Brush Tool icon at the top left of your photo. When you click this icon, a panel will open at the bottom with several options for adjusting the brush.
Let’s focus on the Brush Settings option and adjust it to your desired size. This will enhance your photo’s appearance without adding too much extra work, especially if you must make multiple brushstrokes in a single area. Looking back at your image, you may notice that the light is coming from the left, illuminating your subject’s face. You’ll want to brush the right side of her face so that it receives less highlight information.
After you adjust the settings, you’re ready to brush out the shadows. Just like clicking to select an area, hold down your left mouse button as you move your cursor around your screen. This will allow you to draw a brush over another part of your photo and give it the settings selected in Lightroom’s panel.
You’ll want this brush to be the same width as the window in your photo, so you’ll select a brush and drag it over until it’s smaller than the window.
Now let’s move on to brushing out these shadows!
- Start at the top of the subject’s forehead and use small strokes until every part of the face looks natural (you can adjust the tone with the other sliders later).
- Make sure you’re brushing in a different direction than the shadows. If they were coming from the top left, you should brush gently downwards and towards the right side of your photo.
- Remove any small shadows until the area looks natural.
When you’re done, you can see no more harsh shadows in areas where your subject is lit with sunlight. This should help improve lighting on parts of the photo that don’t have any shadows.
If your photo is open in Lightroom’s Develop module, click the Brush icon in the bottom right. You’ll notice a small drop-down menu on top of this panel. Use this option to choose if you want to make changes with this brush or adjust it further (you can also change its size, feathering, and opacity).
Note: If you have difficulty seeing the effect of your brushstrokes, try adjusting the Brush Opacity in Lightroom’s toolbar. It controls how strong the product is when it appears in your photo.