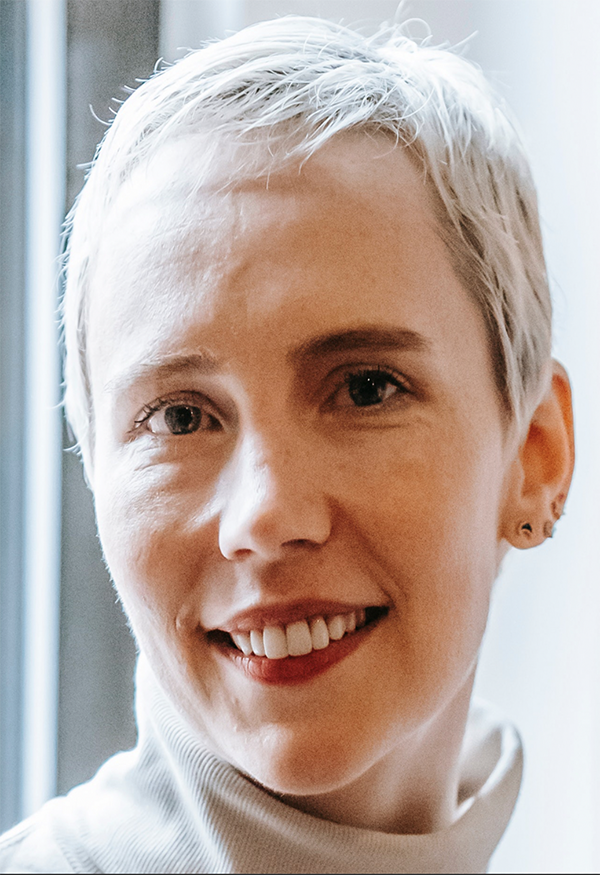
Smooth skin is a very important part of any photo editing project. It can make or break the final image, and it’s something that you should learn how to do well if you want your photos to look their best. In this tutorial we will show you how to smooth skin using Adobe Photoshop so that you can achieve a professional-looking portrait photo. Let’s get started!
Step 1: Open your image and press Command/Control + J twice to create two separate layers. Rename the top layer Inverted.
Step 2: Press Control/Command + i to invert it.

Once inverted, you’ll see more lines that need smoothing.
Step 3: Go to the Filter menu, hover on Other, and select High Pass. Set the pixel radius between 20 to 24 and click Okay.

Step 4: Go to the Filter menu again. This time, select Gaussian Blur from the Blur sub-menu. Set the pixel radius to 2 and click Okay.
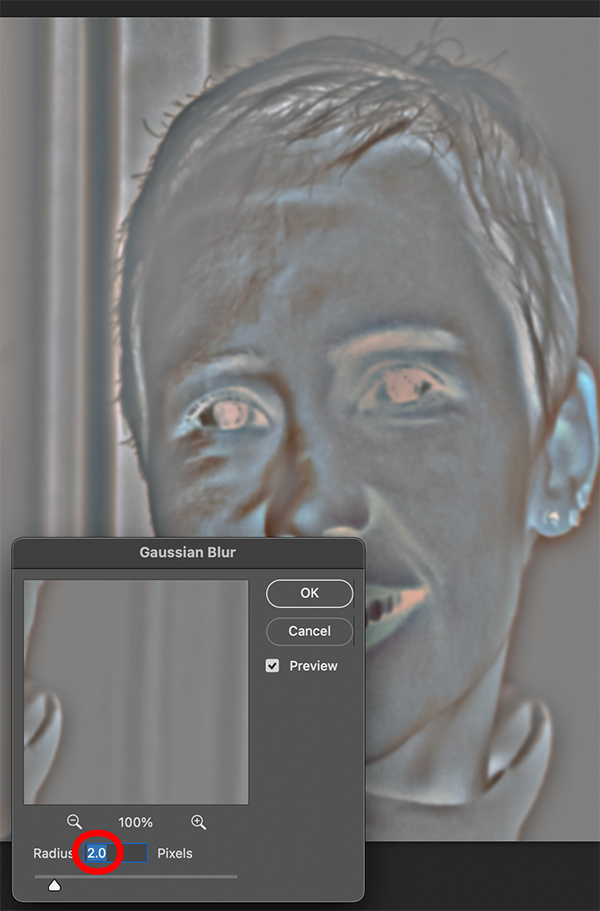
Step 5: Go to the blend mode menu in your layers panel and select Vivid Light as the blend mode.

This is what your photo should look like.

Step 6: Press the Alt key (Option for Mac), plus the Add Mask icon at the bottom of your layers panel. This will create a black layer mask next to the image in the top layer (as shown below).
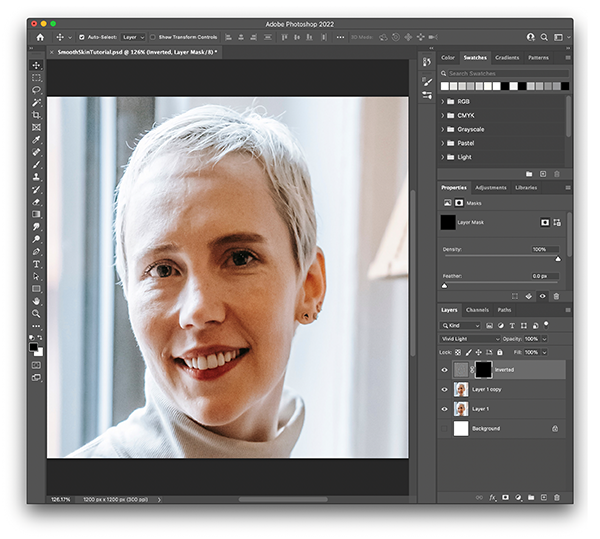
Step 7: Click on the black mask to select it. You will use this mask to edit your subject’s skin textures. This mask will also protect your original image.
Zoom in, grab your brush and make sure that you have white selected for the color foreground.
Start brushing the soft areas of the face. Avoid the lips, nose, and anything that has a hard edge. We’ll start with the forehead, since it has softer wrinkles.
Before
This is what her forehead looked like before the skin smoothing process.

After
As you can see, the mask and brush smoothed out quite a few of the wrinkles, but didn’t remove some of the deeper ones. Next, we smoothed out her other cheek, the bridge of her nose and her chin.

You’ll have to avoid areas, such as eye shadow and smile lines because they might not blend correctly. This is the result:
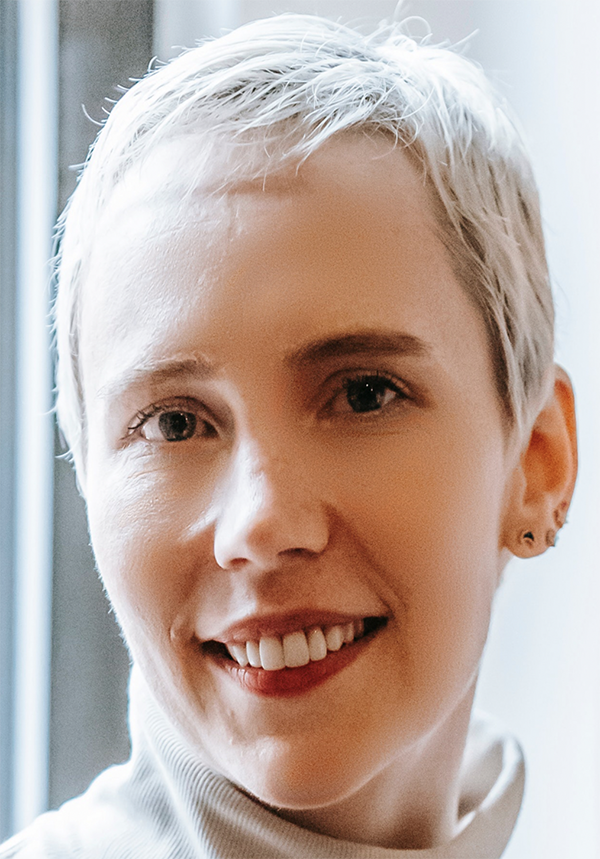
The finer wrinkles were softened on her forehead and beneath her eyes. We smoothed out the blemishes and freckled areas of her cheeks, chin, and the bridge of her nose.
While it’s obvious that she’s an older woman, her face has a brighter, more youthful look.
If you still see spots that you would like to improve, you can use the Healing Brush tool as a touch-up.
Step 8: We’re going to soften the shadows for the final step. Go to Layer 1 and lower the layer opacity to 30 – 40% range. Then select the Dodge tool. Finally, choose Shadows from the Range options menu in the Options panel. Move over to the Exposure setting and set it between 3 to 5%.

Brush over an area where you need to lighten up the shadows. We brushed over the left eyelid in our photo because we felt that it needed some lightening. Zoom in and out of the photo to check your results. Continue working until you get the effect that you want. When you’re finished, save the image as a PNG.
Frequently Asked Questions
How Do You Remove Blemishes With Photoshop?
There are several ways to fix skin imperfections. The most common way is using the Spot Removal feature. You can also try healing tools or cloning techniques.
How Do I Use Photoshop To Smooth Deep Wrinkles And Acne Scars In A Photo?
To achieve this type of transformation, you will first need to create a new layer above all others. Select the Clone Stamp Tool and then press Ctrl+Alt+Shift+Eject/Backspace to open the Layers Panel.
Click on the New Adjustment Layer button at the bottom right corner of the Layers Panel. Name the adjustment layer “Smooth Wrinkles” and drag its Opacity slider down to 50%. Now go back into the original photograph and paint away any unwanted creases by selecting the Smoothing option when painting.
Once done, change the blending mode of the layer to Soft Light. If there are any remaining marks, repeat the process. For best results, work slowly and carefully so that you don’t accidentally erase too much detail.
Why Is The High Pass Filter Great For Smoothing Skin?
High pass filters allow us to isolate fine details while removing larger objects. It works well for smoothing skin because it removes large pores without affecting smaller features.
Where Is The Smooth Tool In Photoshop 2021?
It’s located under the Effects tab in the Tools section. Clicking on the icon opens the dialog box shown below. From here, you can adjust how much blurriness you’d like to apply.
Where Is Refine Edge In Photoshop 2021?
Refining edges allows you to make adjustments to specific parts of the picture. In order to refine edge settings, click on the Refine Edges button. A small window appears which contains various sliders. These include Amount, Radius, Threshold, and Tolerance. By adjusting these values, you can control how sharp or soft the edges appear.
How Do I Change The Skin Tone Of A Photograph In Photoshop?
You’ll have to start off by creating a duplicate copy of the background color. Next, add a Curves Adjustment Layer and move its Midpoint Slider to 0. This will darken the entire image. Lower the Opacity value to around 20-30%, depending on what kind of look you prefer.
If you feel that the contrast needs more tweaking, simply increase the Contrast setting. To brighten things up again, raise the Brightness value. Finally, if you wish to reduce noise levels, lower the Noise Reduction setting. Save the file in JPEG format.
What Is The Difference Between Levels And Curves?
Levels and curves both offer similar effects but they each serve different purposes. Levels adjust brightness and darkness across the whole image whereas curves only affect one particular part of the image.
Are Skin Softening Plugins Available For Photoshop?
Yes! There are many free and paid options out there.
The most popular ones are:
- Portrait Pro
- The Luxe Lens
- Beauty Box Photo Editor
- Skin Smart
Are Smooth Face Brushes Better To Use Than The Default Soft Brush In Photoshop?
No. The default soft brush does an excellent job of applying subtle changes to your images. You should be able to get pretty good results by just using the default tools. However, if you want to take advantage of some additional editing techniques, such as adding highlights or shadows, you may find yourself needing to switch over to other types of brushes.
Can We Use The Healing Brush To Remove Wrinkles?
No. While the healing brush does help fix minor imperfections such as blemishes, it cannot be used to correct deep lines or wrinkles. You should instead try using an eraser with some pressure applied to get rid of them.
What Is The Best Way To Remove Dark Circles Under The Eyes With Photoshop?
There are several ways to achieve this effect. The easiest method would be to create a new Hue/Saturation Adjustment Layer and then select Colorize from the dropdown menu. Then choose Black & White from the Preset list. Once selected, set the Saturation level to -50% and leave everything else alone.
Another approach involves duplicating your Background layer and applying a Gradient Map filter over it. Select the gradient map type “Gradient Overlay” and drag down until you reach 100%. Set the opacity at 50% and save the file as a PNG.
If you’re looking for something less drastic, consider going back to the original photo and adding a vignette to give the illusion of depth.